The kind of slideshow you're making in Microsoft PowerPoint may or may not benefit from the use of music. You can wish to use a lively exuberant music on a slide or a delicate, understated melody all through the presentation.
We'll go over a few alternative methods for adding music to PowerPoint before demonstrating how to use a single song on a slide or play background music continuously.
Upload a song from your computer
Uploading a song from your PC is most likely the simplest approach to include music in your presentation. This song may be one from your playlist or one you've saved and frequently listen to.
Step 1: Open your PowerPoint presentation and select a slide to add the music.
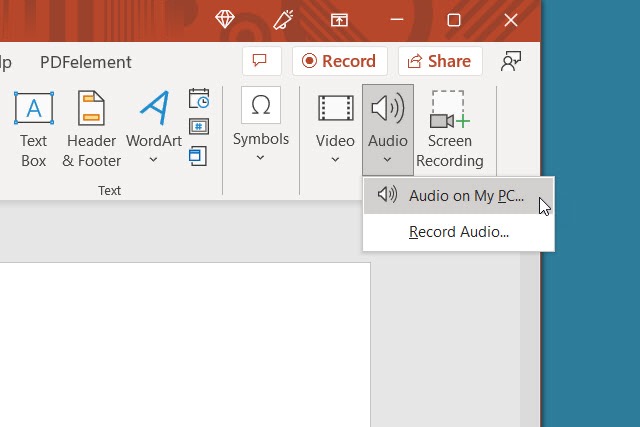
Step 2: Go to the Insert tab and choose the drop-down arrow for Audio on the right side of the ribbon.
Step 3: Pick Audio on my PC, browse for the music file, and select Insert.
Step 4: You’ll then see an audio icon on your slide for the song.
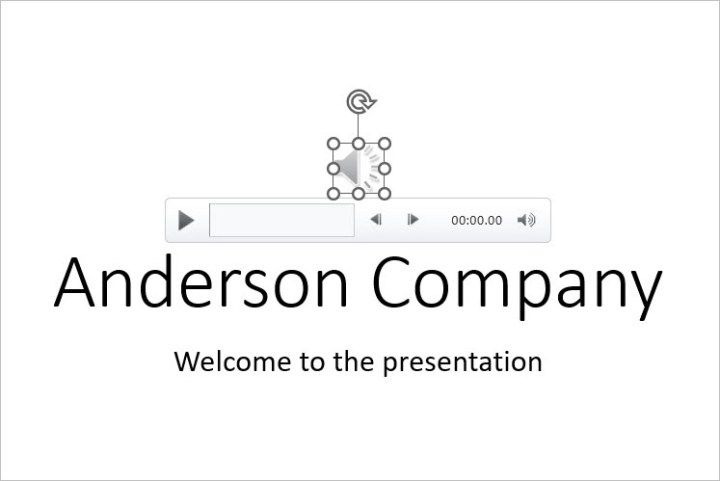
Step 5: Use the Play button to listen and the Playback tab to adjust the playback options.

Download free music
Perhaps you already know the kind of song you desire, but your computer doesn't contain a copy of it. There are a few web sources where you may get free tracks with no royalties for presentations.
Fesliyan Studios Inc.: Choose a genre at the top such as commercial, happy, sad, or relaxing. Press the Play button to listen, then check out alternate versions where available. Choose Download to get the song.
Chosic: You’ll see a slew of songs for presentations from upbeat to soft. When you hear the song you want, select Download > Free Download.
SoundCloud: If you’re already a SoundCloud listener, this is a good option for presentation music. Type “free downloads” or similar into the search box and review the results. When you find the song you want, select More or the three dots to download the tune.
There are a few ways to download MP3s from YouTube if you can also discover free music there.
Once you've downloaded a music from this list, store it to your device and then upload it to the slideshow as previously mentioned.
Record music while creating the slideshow
You can record a song right in PowerPoint if you're fortunate enough to be musically talented. Make your own presentation music by warming up your voice chords or picking up a guitar.
Step 1: Open your PowerPoint presentation and select a slide to record the music.
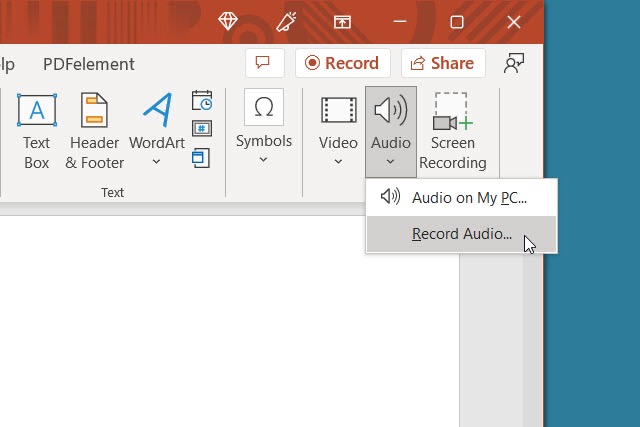
Step 2: Go to the Insert tab and choose the drop-down arrow for Audio on the right side of the ribbon.
Step 3: Pick Record audio. Note: You must have either a built-in or external microphone for your computer.
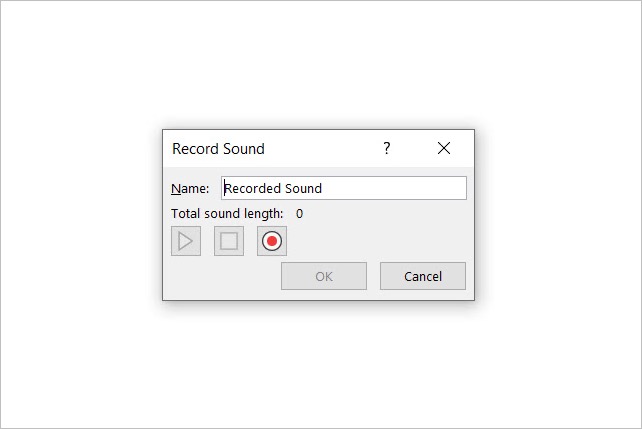
Step 4: When the Record Sound box appears, select the red, round Record button to start recording.
Step 5: Press the square Stop button when you finish. To listen to the recording, press the green Play button.
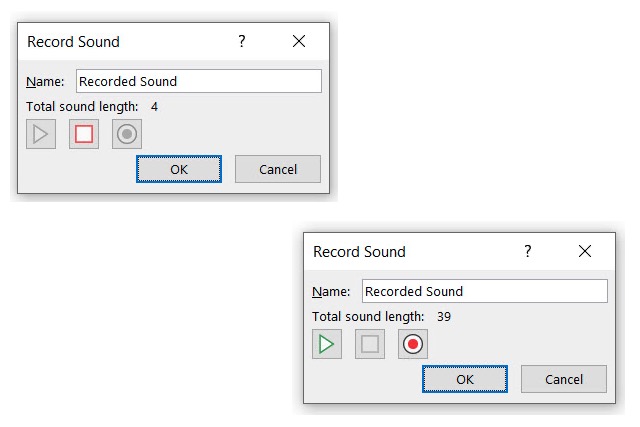
Step 6: When you finish, select OK to insert it onto the slide.
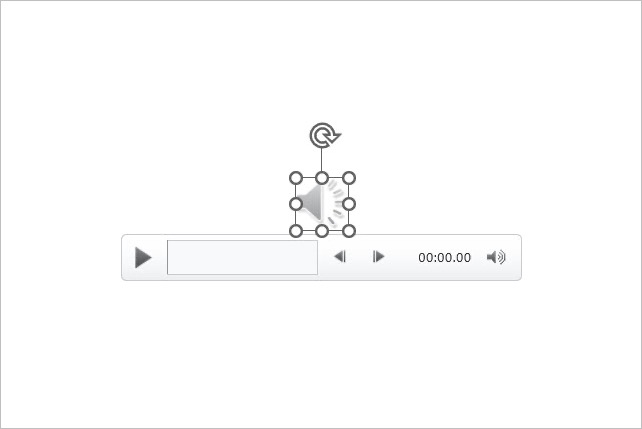
Step 7: You’ll then see the audio icon just like with an inserted audio file. Press the Play button to hear the recording.
Add an offscreen video
Sometimes a video is associated with the perfect song for the circumstance. There is a workaround to include that song in your show even though you can't currently just play the audio and you definitely don't want the video as part of your presentation.
Step 1: Open your PowerPoint presentation and select a slide to add the video.
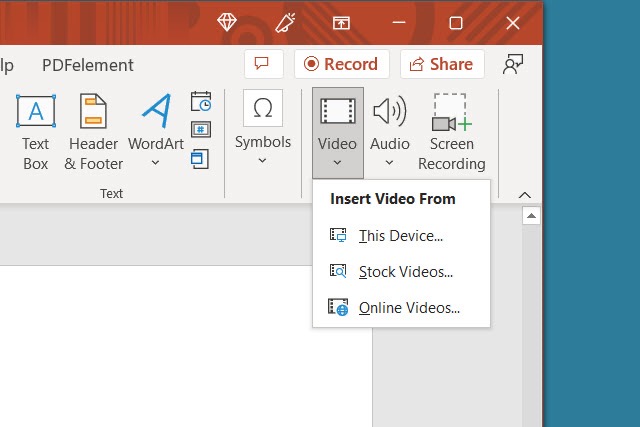
Step 2: Go to the Insert tab and choose the drop-down arrow for Video on the right side of the ribbon.
Step 3: Pick This Device, Stock Videos, or Online Videos and follow the prompts to insert the video.
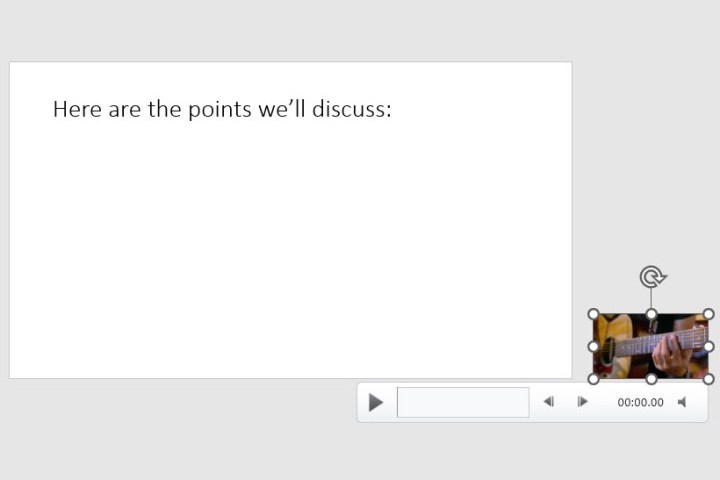
Step 4: When the video appears on the slide, drag a corner or edge to make it smaller and then drag it off of the slide to one of the sides.
With this, you can play the video to hear the audio only—you won't be able to view it in your slideshow.
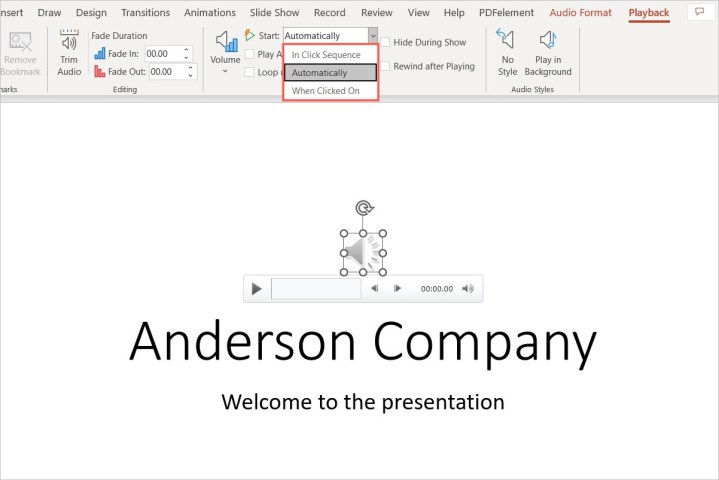
Step 5: Select the video and use the Playback tab to adjust the options for playing it when clicking the slide or automatically.
Play the song or use as background music
Once you've added the music to PowerPoint, you can decide whether it should play continuously during the presentation or only on one slide.
Step 1: Go to the slide containing the music and select it.
Note: Depending on your preference, you'll probably want the file on the first or second slide if you want the music to play continuously throughout the slideshow.
Step 2: Head to the Playback tab and choose to play the song with the slide or as background music.
Step 3: To play the song only on that slide, choose the Start drop-down box in the Audio options section of the ribbon and pick how you want the music to begin. You can select In click sequence, Automatically, or When clicked on. When you advance to the next slide, the song stops playing.
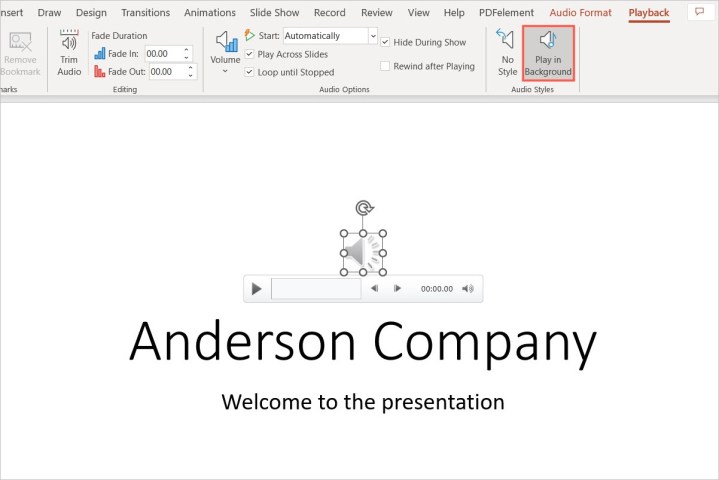
Step 4: To play the song throughout the presentation, select Play in background in the Audio styles section. This automatically checks the boxes for Play across slides and Loop until stopped. You can also choose an option in the Start drop-down box for how to begin playing the song.
Remember that the method mentioned before, which uses video files, does not apply here; only audio files do.
Step 5: Adjust any other options on the Playback tab per your preference. You can increase or decrease the volume, rewind the song after it plays, or add a fade in or out effect.
After you've included the music, don't forget to practice your presentation to make sure it sounds the way you want it to. You can also think about including closed captions for hard of hearing people.

:max_bytes(150000):strip_icc():format(webp)/NEW13-1d5986e62a814ca4af73d9415e62977a.jpg)
:max_bytes(150000):strip_icc():format(webp)/Rectangle66-9c4b15ac2d89473b9b6157ede07d7196.jpg)
:max_bytes(150000):strip_icc():format(webp)/Untitleddesign-3d1a085381d34b03ba36a32ef6977466.jpg)